Whānau Plan
Once you have completed a Needs Assessment and identified priority focus areas for the Whānau, you are ready to build the Whānau Plan.
Like everything in Kotahi, you can come back any time and build on this. However, think of this Whānau Plan as something which evolves over time.
The Whānau Plan is one of the few things that does NOT automatically save or allow you to Park.1
Always remember to click Save and make sure there are no missing values, otherwise you may lose your work!
Starting a new Plan
From the Overview screen we were at - viewing our Assessment results - you can go directly to creating a new Plan. This opens a new tab where we can start work.
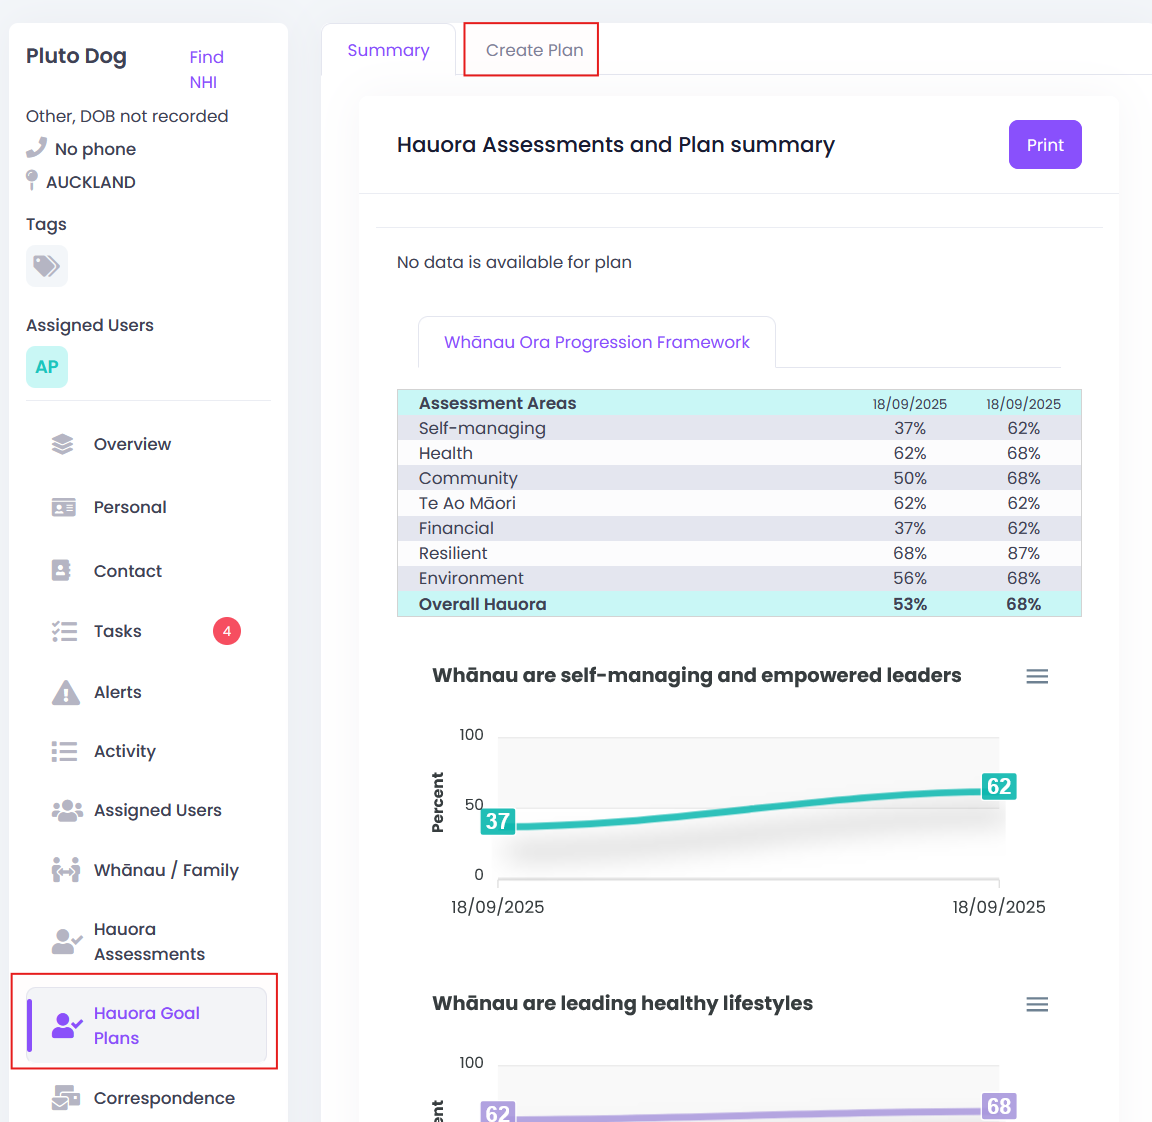
Aspirations
Front and centre in the Whānau Plan are 'aspirations'. This is in first place to ensure that the Whānau's own wishes and aspirations - in their own words - are properly represented, and form a foundation for ongoing work. This must be completed for you can save.
Plan structure
Layout of the Whānau Plan might seem intimidating at first, but it follows a very simple and logical approach:
- A Goal is defined
- The Goal must link to a Domain area that is highlighted in the Assessment
- A Goal must have at least one Action, but can have multiple.
- Actions are the responsibility of specific people - Whānau, Navigation team, other agencies or support networks.
Think about this as a series of building blocks. Any Goal can be broken down into concise Actions that have to be taken to achieve it. Getting a new job might require driving a car, which requires a licence and a vehicle.
Setting one big Goal without any further detail would be hard to track, and may feel overwhelming for Whānau.
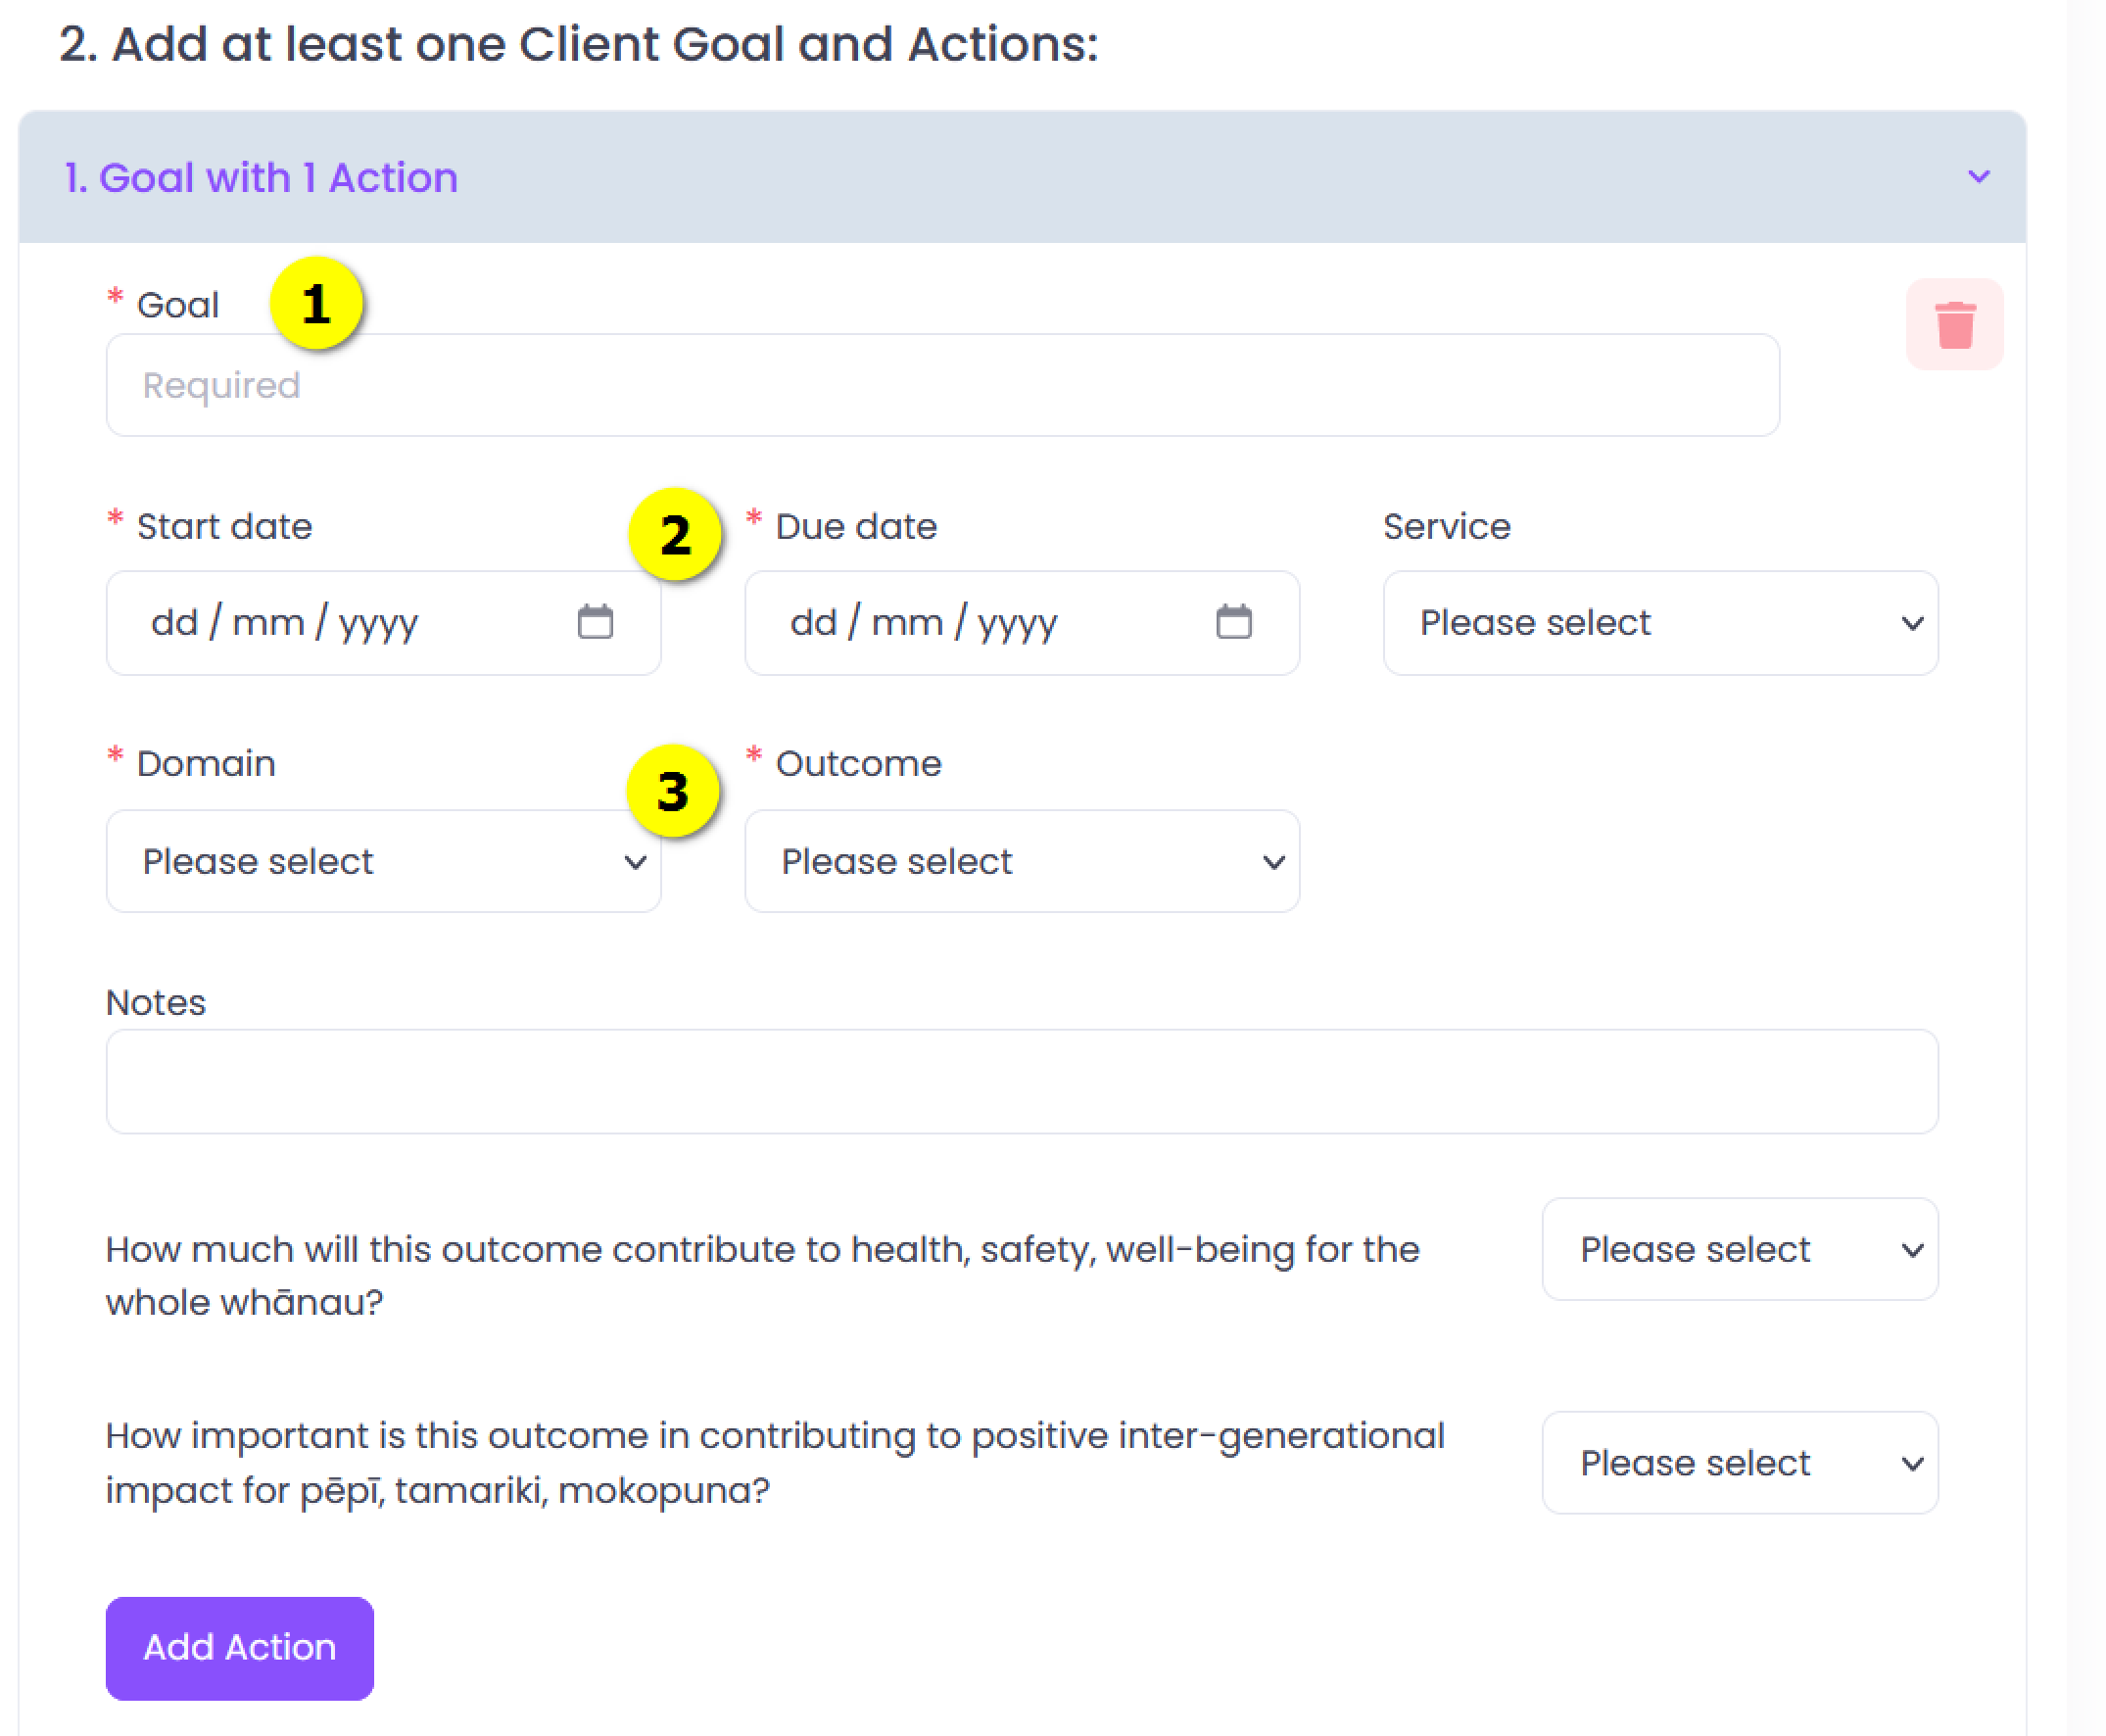
- Provide a brief description of the goal in one sentence.
- Set some overarching start and end dates for achieving this goal.2
- Clarify which Outcome Domain this links to - keeping a line of sight back to the most recent Assessment.
Actions
Here you need to break the Goal down into manageable chunks.
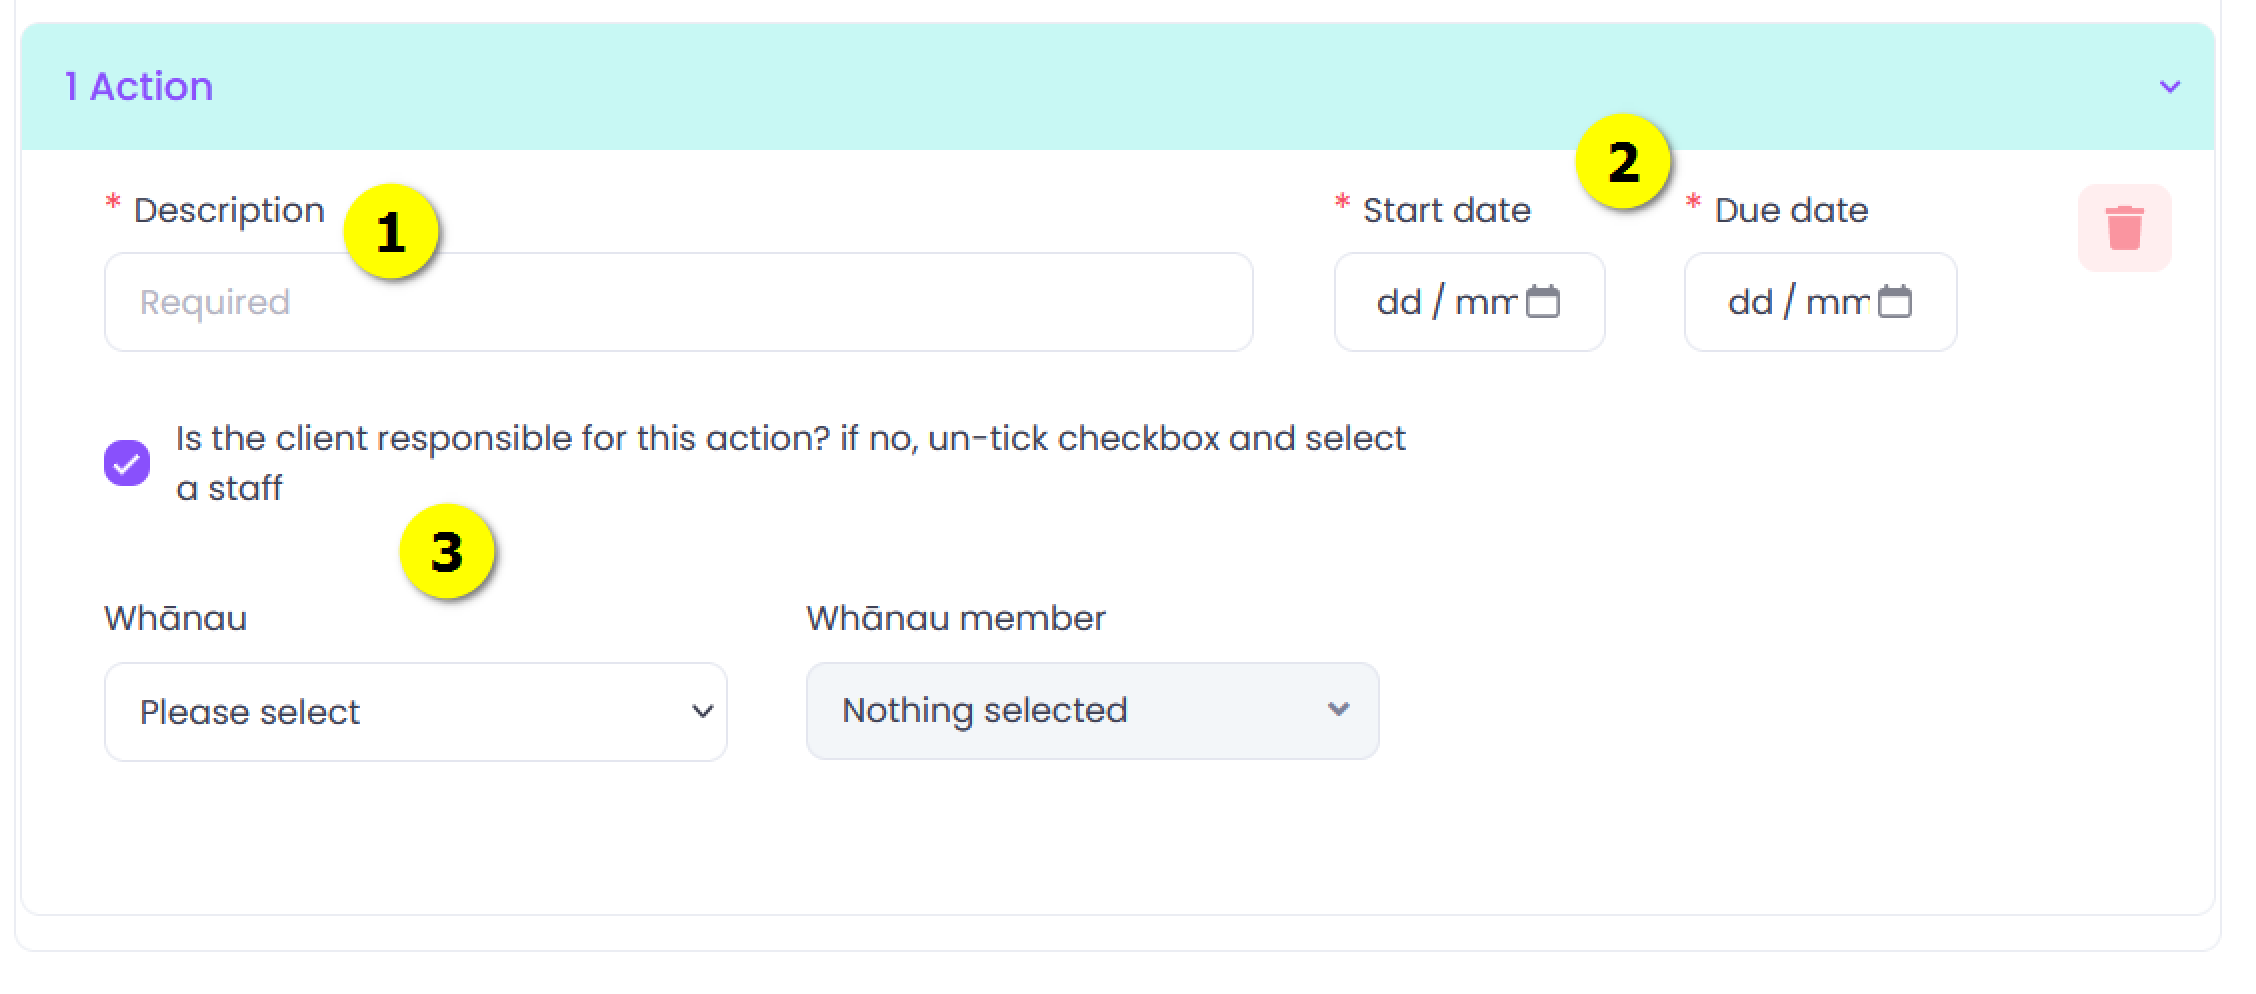
- Again, provide a brief description of the required Action.
- Set out some start and end dates.
- Confirm who is responsible. If you untick the checkbox you can select a staff name, to add them as a responsible party.
Once you've finished just click Save and, as long as you haven't missed anything, you'll be taken out to the Review Plan page.
As you're building out your Goals and Actions, it can be really easy to accidentally click 'New Goal' instead of 'New Action'.
Watch out to make sure you're clicking the right button here!
Review Plan
Now we have a saved plan, it will automatically become Active and will show as In Progress. If we flick back to the Summary tab, then we see a nice visual representation of our new Plan.
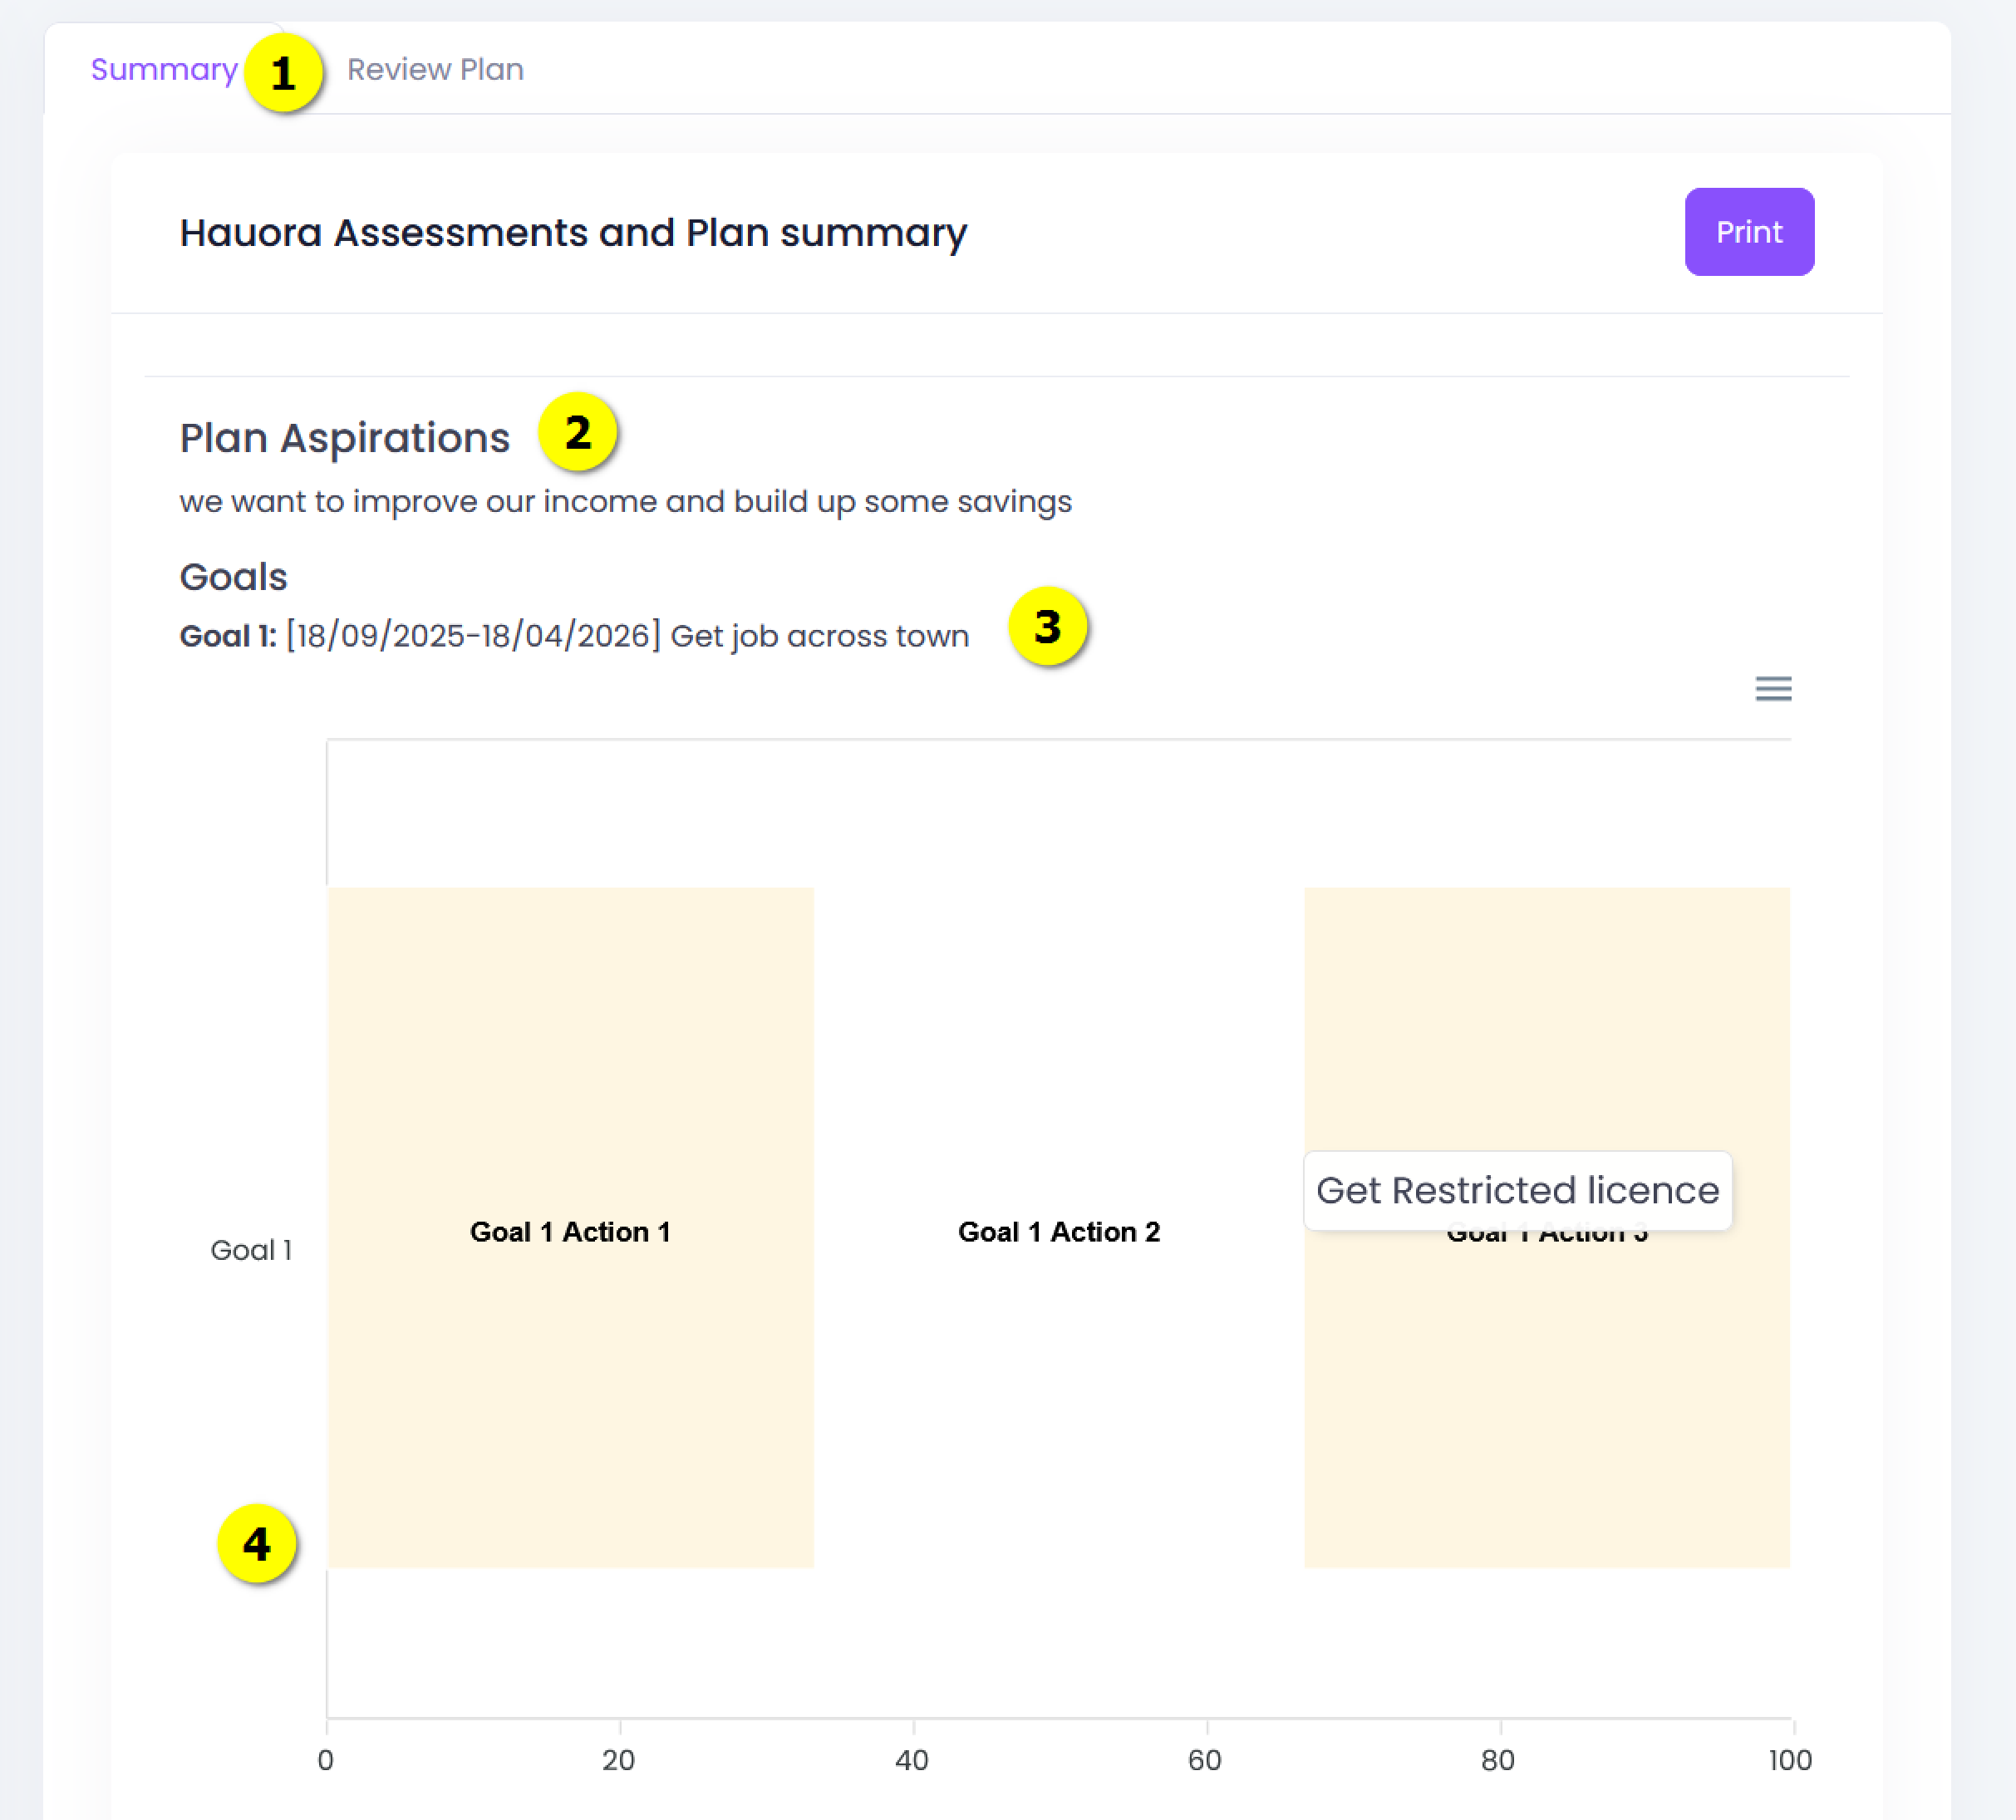
- Flick from the Review Plan tab to Summary to see the overview.
- The Whānau aspirations are again clearly visible here.
- The Goal and its start/end dates are shown.
- The contributing Actions are shown in a graph so that we can see progress towards the Goal.
Not only is it more realistic to break bigger Goals down into Actions, but it means that Whānau and their Navigator can see progress and effort even if the Goal itself is not yet complete!
Being able to capture this data is another way we can demonstrate the complexity of Whānau and their circumstances, rather than a simple binary 'Complete or Incomplete'.
Updating the Plan
At any time, we can go back in and update the information in the Plan. You might want to do this as needed, or you may schedule formal reviews periodically.
A typical workflow would be to come back in and say that an Action has been completed. Let's try that.
If we go back into the Plan detail, we can see that each Action now has a tickbox asking if it is complete. We'll mark one of the Actions as completed.
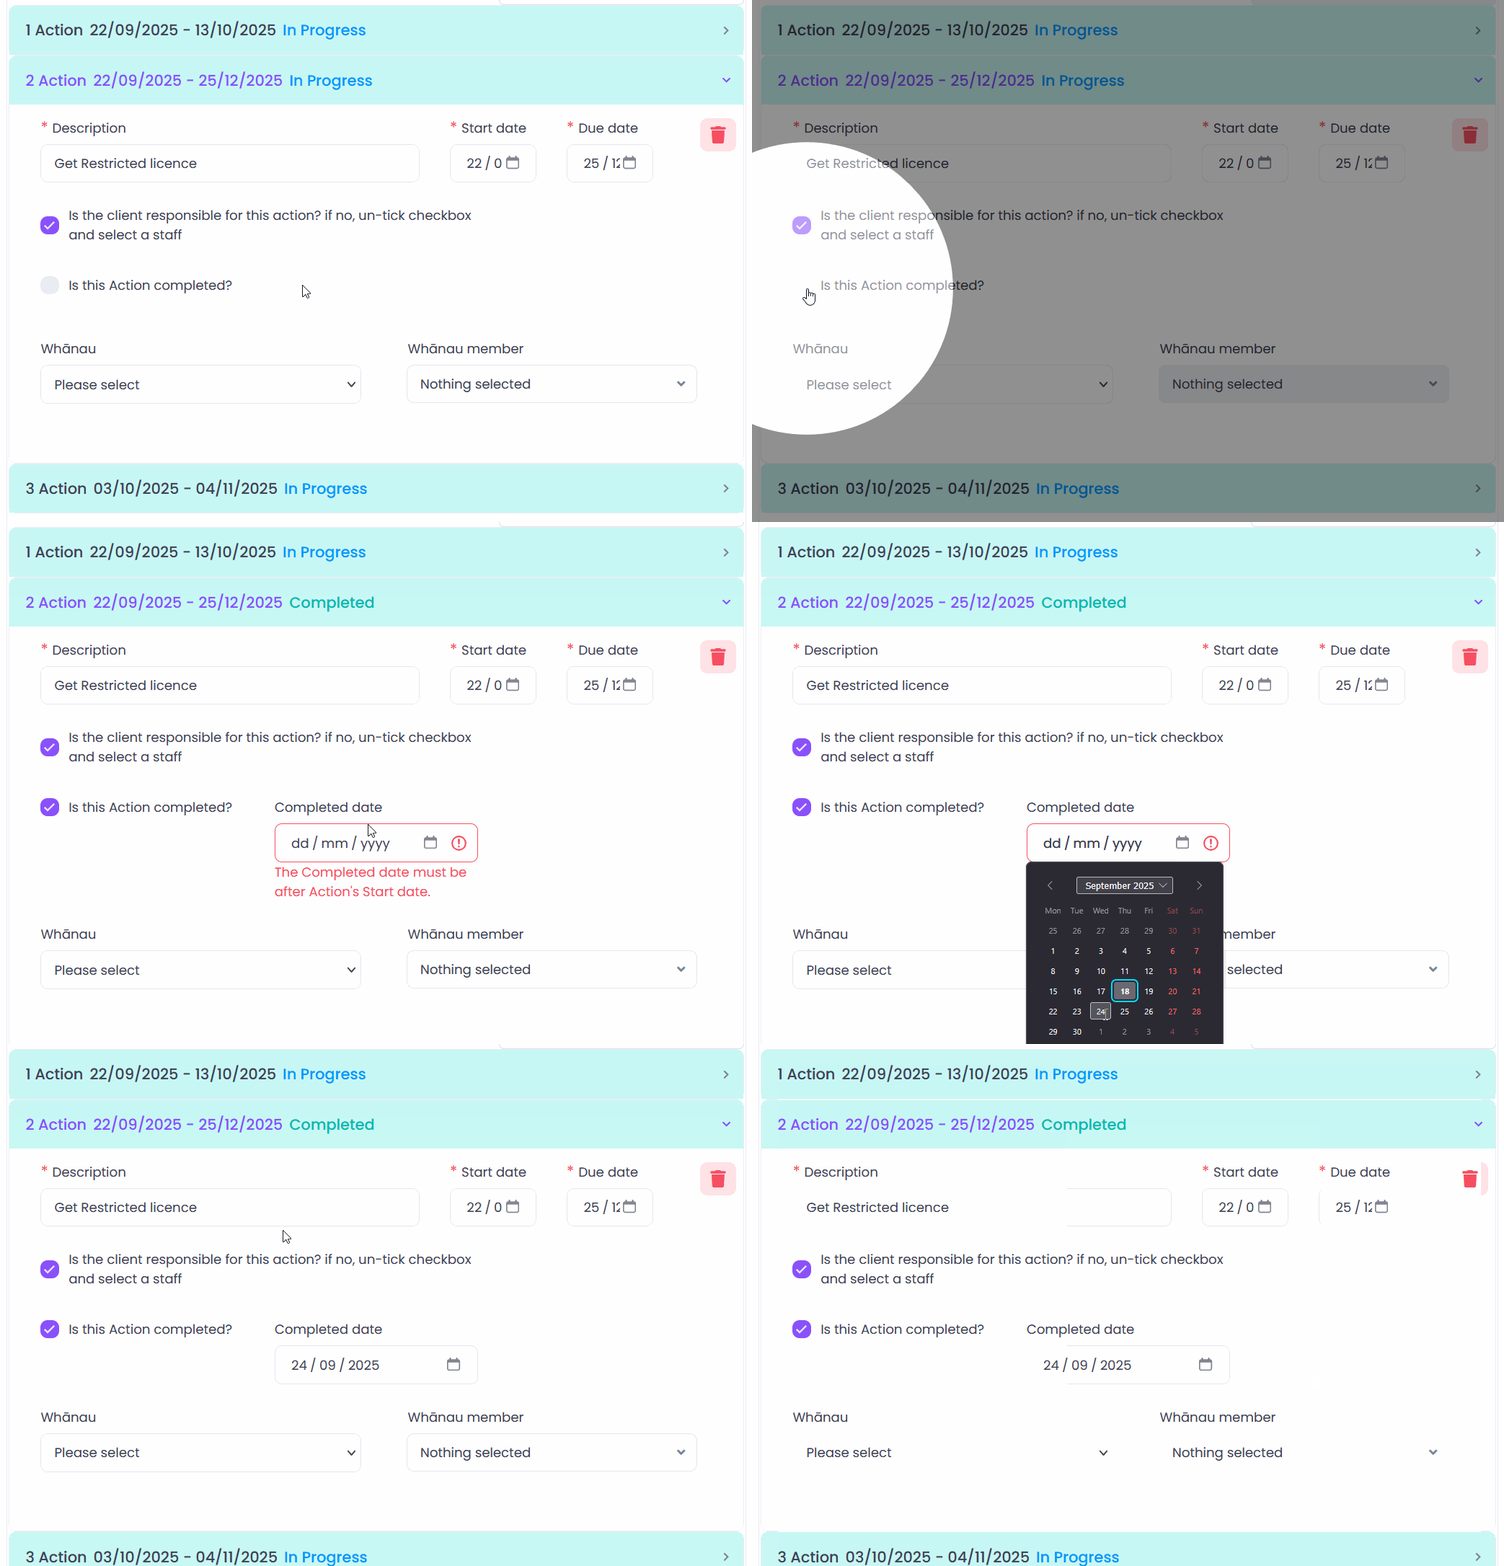
So, completing an Action is very easy. If that is all we want to do for our review, then we can just Save here and our Summary will now update.
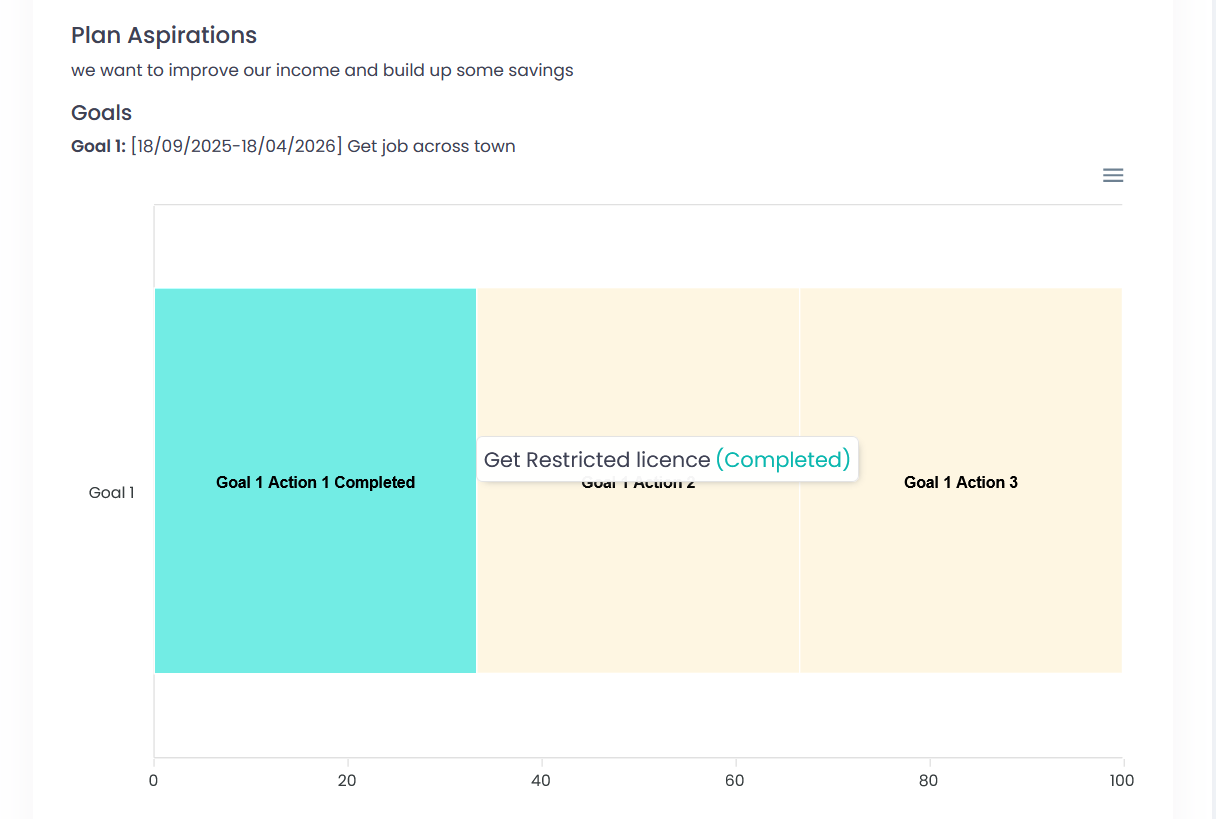
Our completed Action is clearly visible, and we are well on the way to achieving this Goal!
If we wanted to add some Update narrative then that's easy too. Just go back to Review Plan and tick the + symbol next to the Goal.
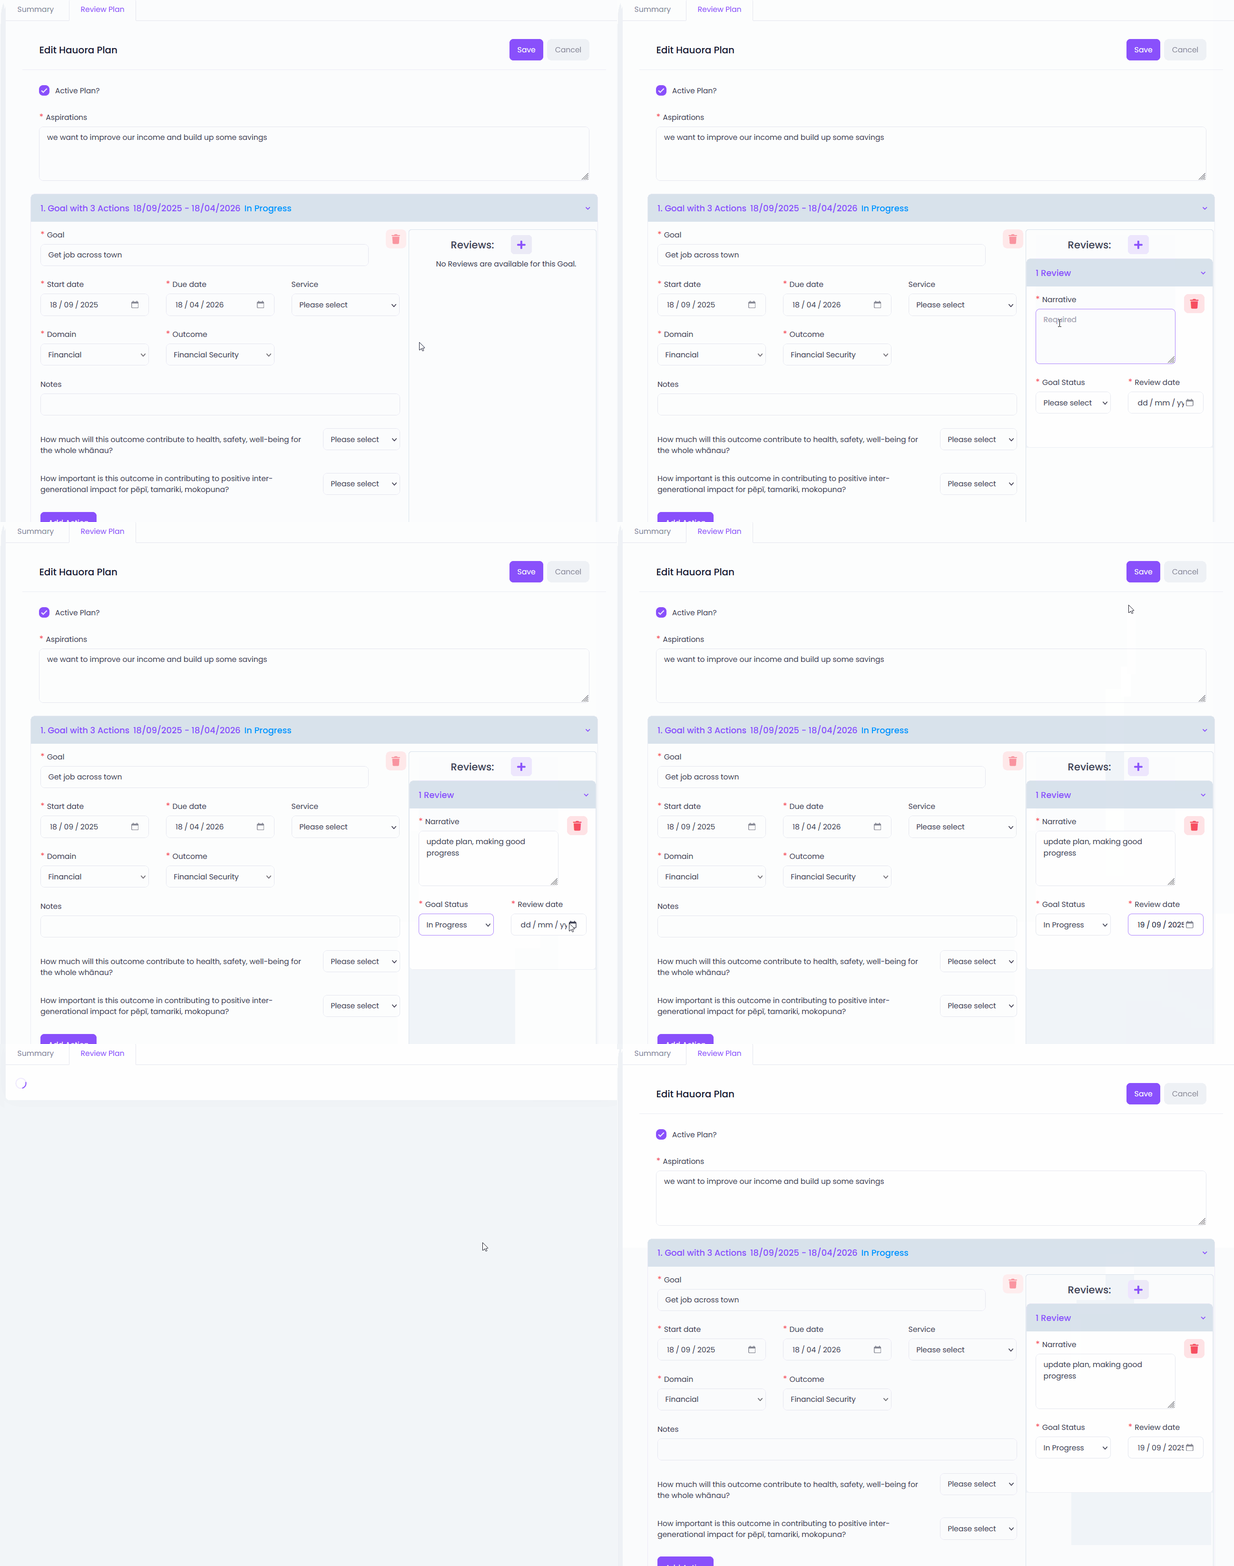
You can do as many of these as you like.
You can only mark a Goal as completed when all its Actions are also complete.
Modifying a Plan
You will have noticed that the Delete dustbin symbol is usually available, so if something is no longer relevant it's easy to just delete.
You can also go in at any time and modify existing information - for example, to adjust start and end dates.
Making another Plan
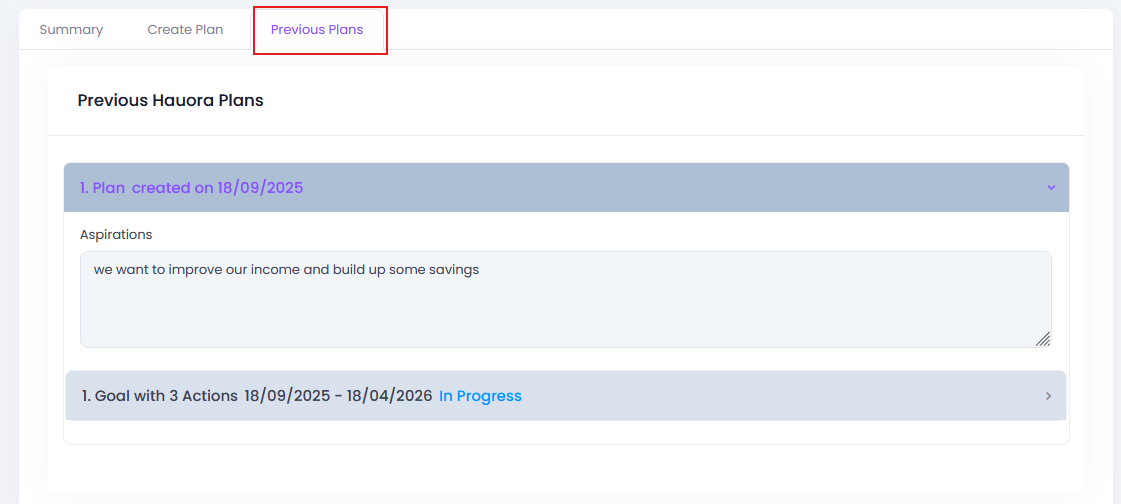
If for some reason you need to start again, you can simply untick the Active Plan checkbox.
This makes the Create Plan tab available to begin again, but now there is additionally a new tab (Previous Plans) which lets you review any ones marked inactive.