Whānau
So far we've dealt with individual clients. But Whānau ora is all about whānau, so let's set that up.
Make sure you set the whānau up before doing any other activity with a client in Kotahi. Certain forms are dependent on these whānau links being established first!
Start off by navigating to a client, and choosing Whānau / Family from the menu (shown as step 1 below).
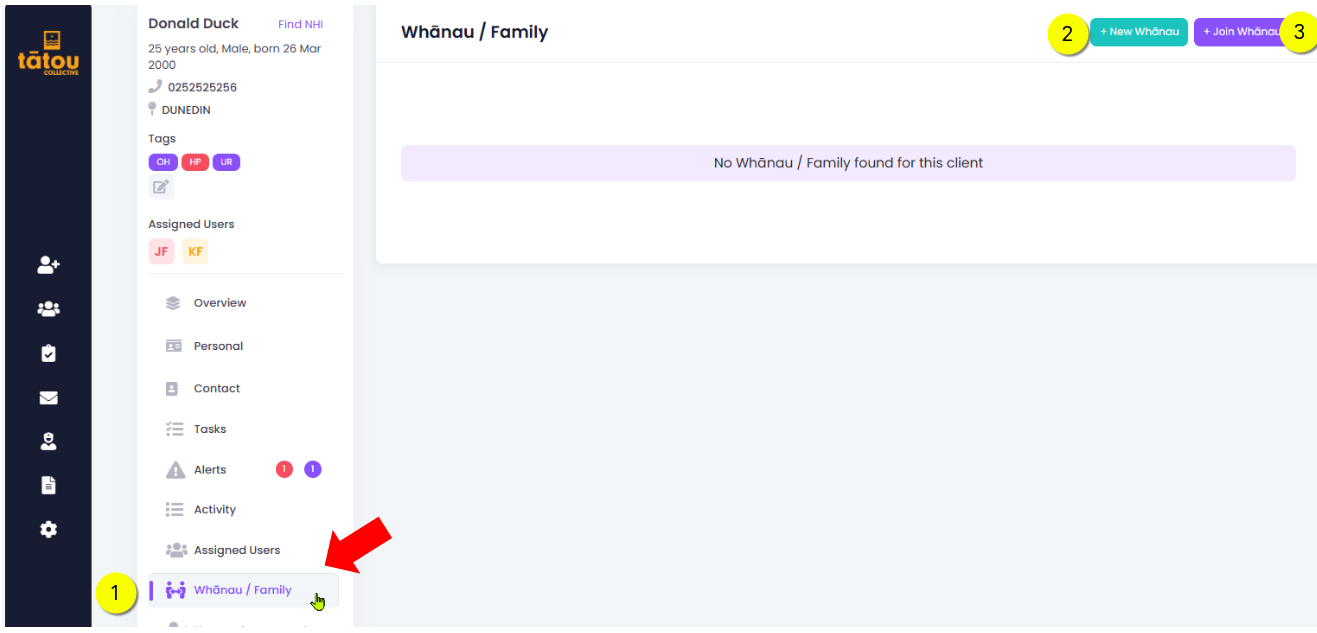
You can now create a New Whānau (step 2) or Join Whānau (step 3).
New Whānau
In Kotahi you have to create the Whānau unit first, and then add members to it.
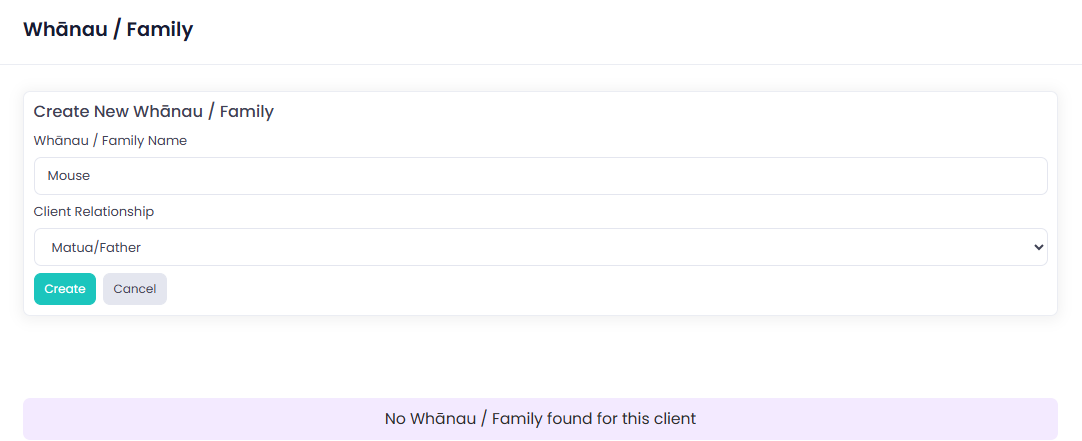
First you have to choose a unique name for this Whānau. This will usually be the surname of the primary contact, or similar.
Kotahi will allow you to enter duplicate Whānau names, so - to avoid confusion - think ahead about a good system to ensure this doesn't happen. For example, you can add client initials or the name of the street they live on.
In the second box you need to choose the Role this client has in the Whānau.
Options here are quite limited, but we are planning to expand them in the future. For now, please select Other for any member who doesn't fit any other options.
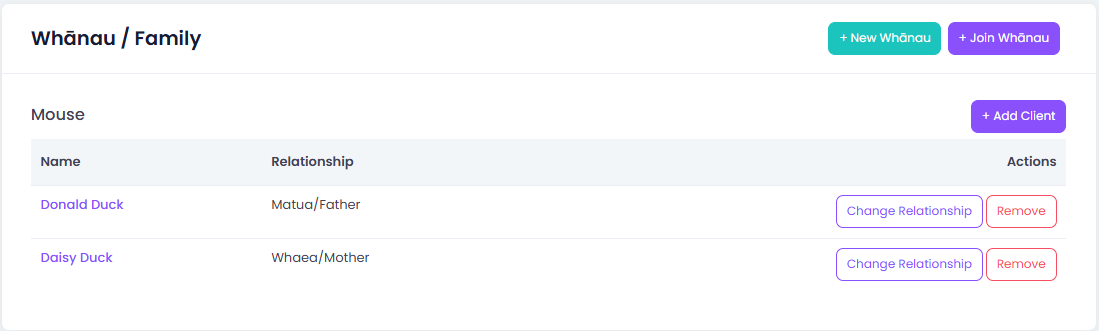
The new Whānau name will now appear, with your client listed underneath (along with the chosen role).
Adding Whānau members
From here, you can go straight to Add Client to add more Whānau members.
You can only select existing Kotahi clients from here.
Just search in the Find Client box, define their Whānau role and then Add them! You'll now see the Whānau with all current members.
Joining a Whānau
Another way to achieve the same thing is to navigate to another client, choosing Whānau / Family from the menu (shown as step 1 in the first image above) and then Join Whānau.
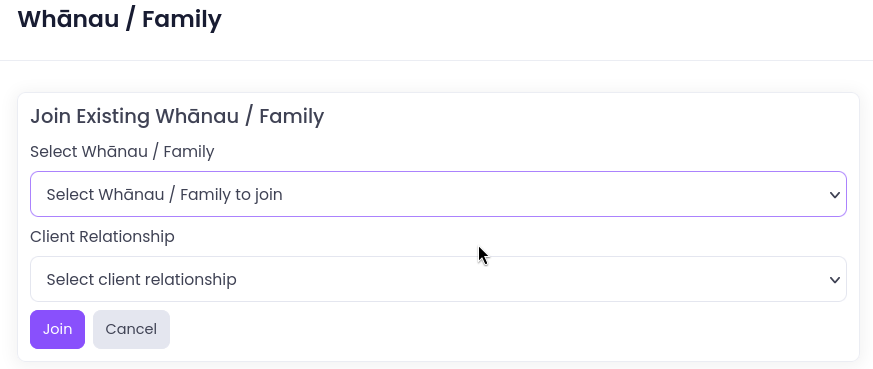
Using this approach, you must select an existing Whānau that you want to add this person into. This is where it's really helpful if you followed the above advice and can clearly identify the Whānau you want! As before, just pick the client's Whānau role and then Join. All done!